With the front panel resto out of the way I ordered up these beauties from M-Machine...

Not too shabby for pattern panels. The inner and outer sills are both long gone on my car, and enough of the floor is rotten to justify whole floor halves. With all that to think about, these m-machine floor halves with pre-built-in sills seemed like a good idea. Definitely a lot cheaper than all the heritage parts added together. They look pretty good on first inspection. I hope they fit!
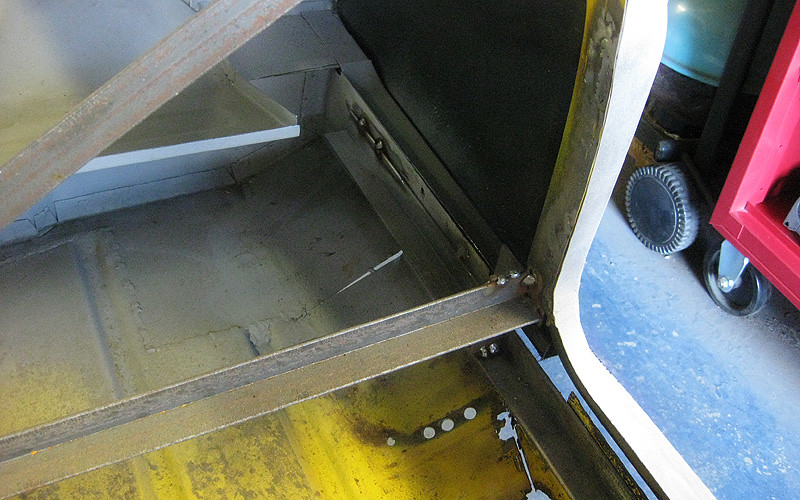
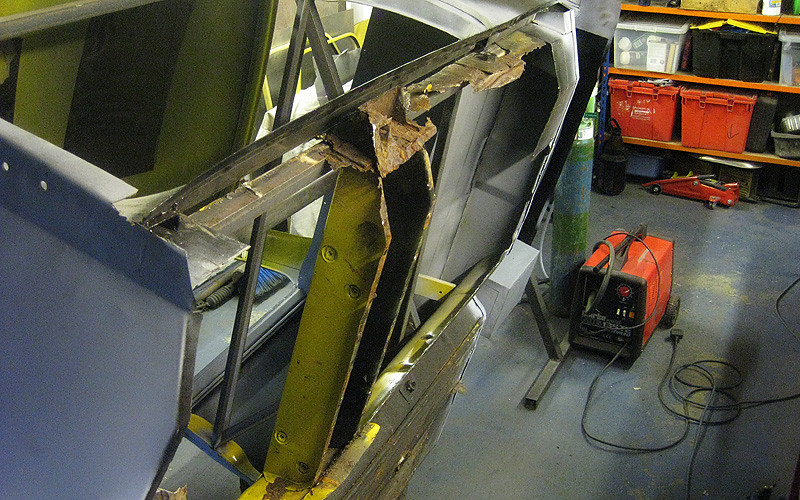
I though I'd put the following pics in to show how I have braced the car because its working quite well so far for floor and sill removal. There is a length of angle running along each old inner sill (just visible at top and bottom of this photo), but it is only welded to the A post, the cross-member and a bit of inner sill near the heelboard.

This length of angle is then tied into the B post, and another length of angle which holds the width of the car steady against the tunnel. With all this in place, I can remove the floor and sills without the side of the car flapping outwards or the cross member getting out of place. I'm keeping the cross-member in-situ even though the floor and sills will be removed from underneath it.

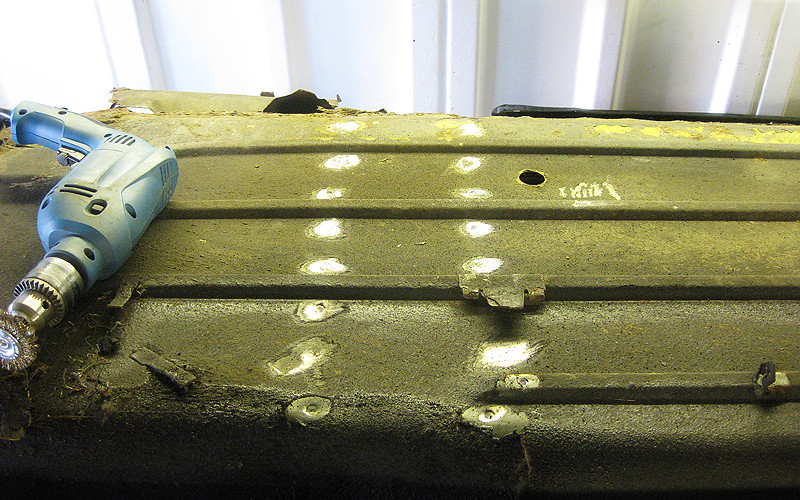
I located the spot welds to be cut out on the cross-member by wire-brushing the underseal from the bottom of the car.

It was easiest to chop out sections of the floor rather than try to extract the whole lot in one go.

The inside of the cross-member turned out to be in OK nick which was a nice surprise. I've got quite a lot of cleaning up and a bit of rebuilding to do on this whole area now before the new floor can go in.

In the meantime, I'm going to get the new floor panels in primer ASAP as they were supplied as bare metal. Not good at this time of year! The only downside I've found so far is the components have been welded together without any protection on the enclosed surfaces. This is a bit of a bummer, bit I'm not going to take it all apart now. Will just try to make sure I can get as much paint on as possible. :)
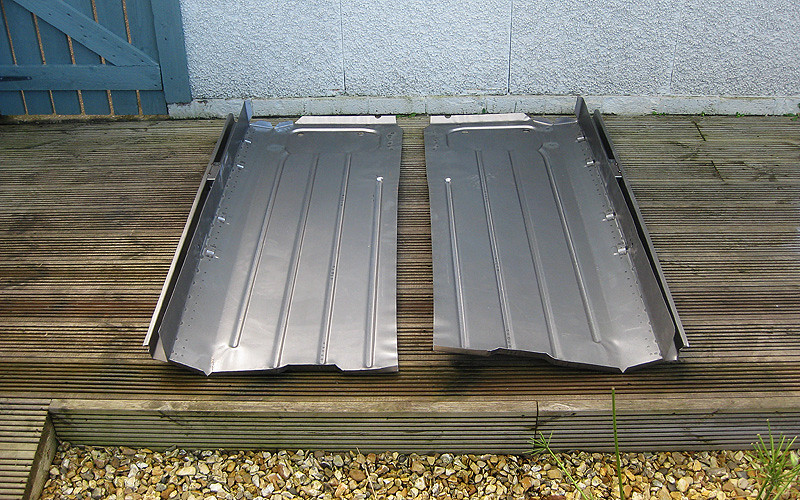
Not too shabby for pattern panels. The inner and outer sills are both long gone on my car, and enough of the floor is rotten to justify whole floor halves. With all that to think about, these m-machine floor halves with pre-built-in sills seemed like a good idea. Definitely a lot cheaper than all the heritage parts added together. They look pretty good on first inspection. I hope they fit!
I though I'd put the following pics in to show how I have braced the car because its working quite well so far for floor and sill removal. There is a length of angle running along each old inner sill (just visible at top and bottom of this photo), but it is only welded to the A post, the cross-member and a bit of inner sill near the heelboard.
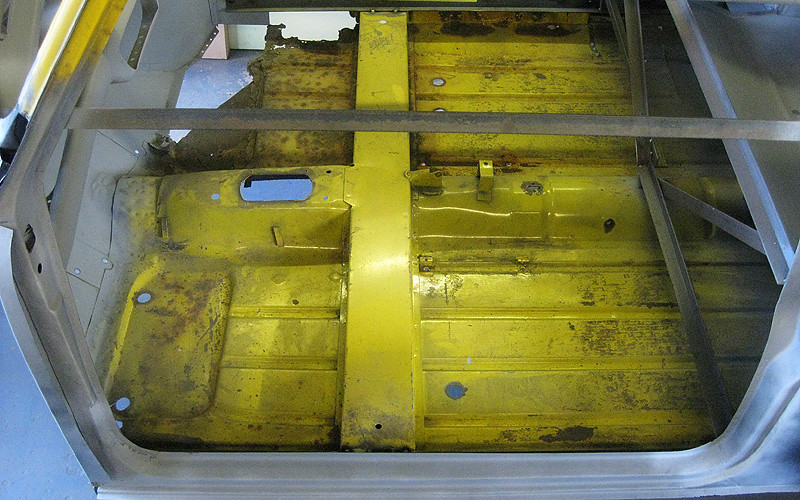
This length of angle is then tied into the B post, and another length of angle which holds the width of the car steady against the tunnel. With all this in place, I can remove the floor and sills without the side of the car flapping outwards or the cross member getting out of place. I'm keeping the cross-member in-situ even though the floor and sills will be removed from underneath it.
I located the spot welds to be cut out on the cross-member by wire-brushing the underseal from the bottom of the car.
It was easiest to chop out sections of the floor rather than try to extract the whole lot in one go.
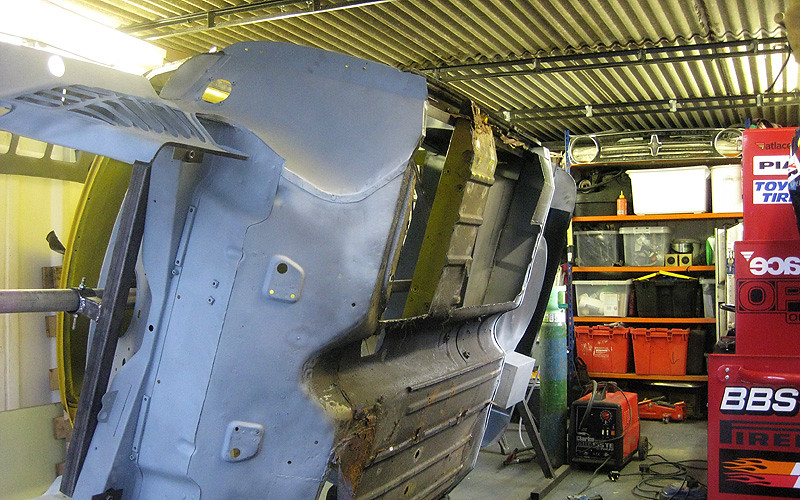
The inside of the cross-member turned out to be in OK nick which was a nice surprise. I've got quite a lot of cleaning up and a bit of rebuilding to do on this whole area now before the new floor can go in.
In the meantime, I'm going to get the new floor panels in primer ASAP as they were supplied as bare metal. Not good at this time of year! The only downside I've found so far is the components have been welded together without any protection on the enclosed surfaces. This is a bit of a bummer, bit I'm not going to take it all apart now. Will just try to make sure I can get as much paint on as possible. :)

No comments:
Post a Comment