
Started looking at smartening up the fuel tank. I've been storing this in the loft waiting to get the chance to repaint it. It definitely needs a bit of surface rust removal first.
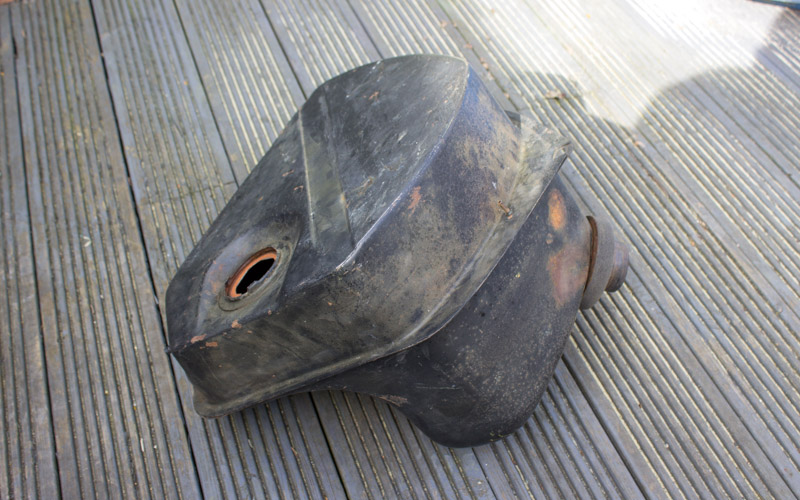
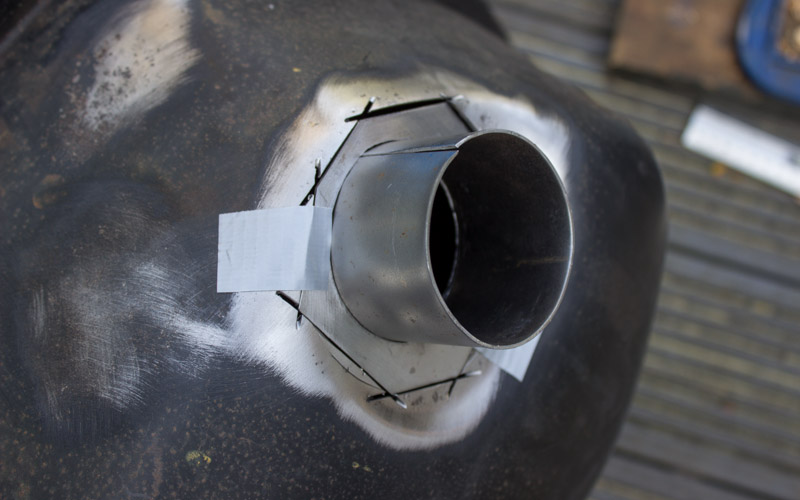
Aaaarrrgh! Scrubbed around the filler neck with the wire wheel and found it had rusted through. Not good.
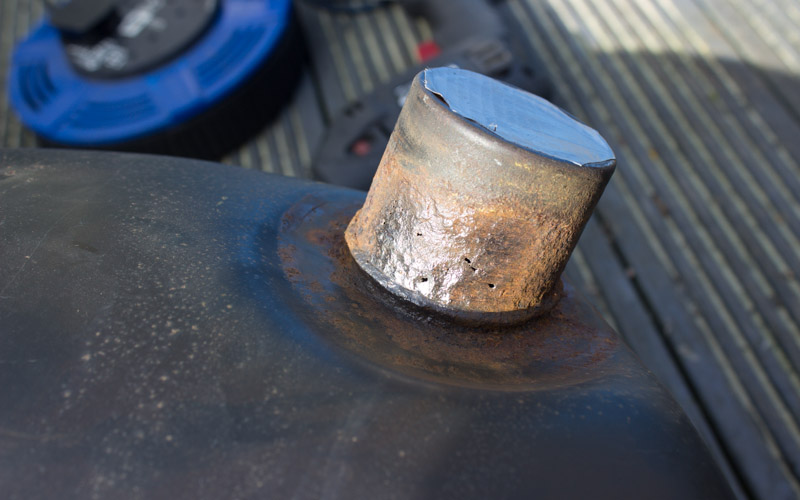
Didn't want to scrap it as it seems to be OK everywhere else and new fuel tanks seem to be eye-wateringly expensive. Thought I'd attempt a repair. First thing, cut out the offending area.
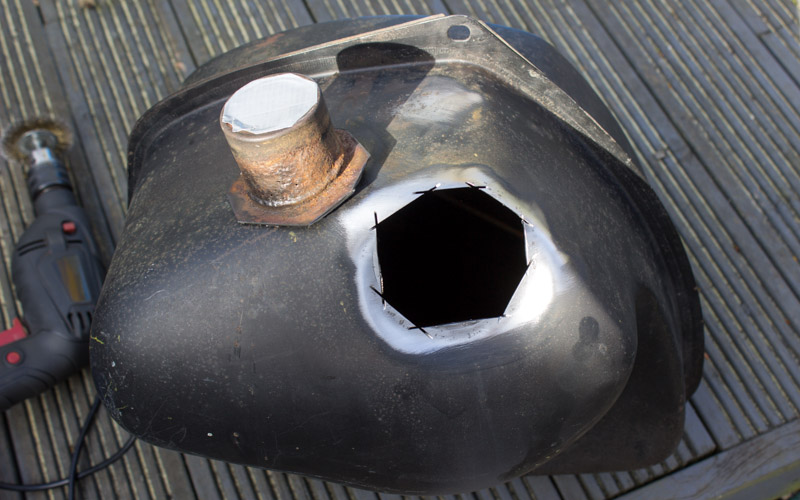
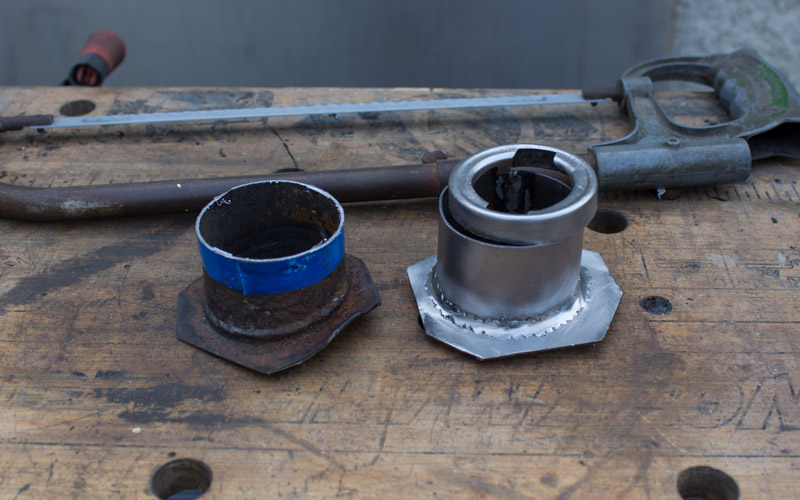
Cut a piece out to fill the hole, and then chopped out the hole in the middle where the neck will go.
So far so good.
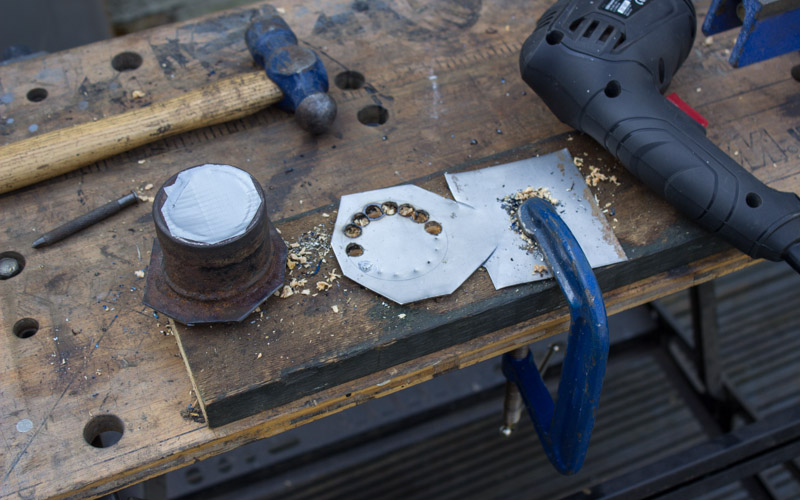
The end piece (nozzle?) was actually OK, so I cut this off the old one and welded it on top of my homemade version.
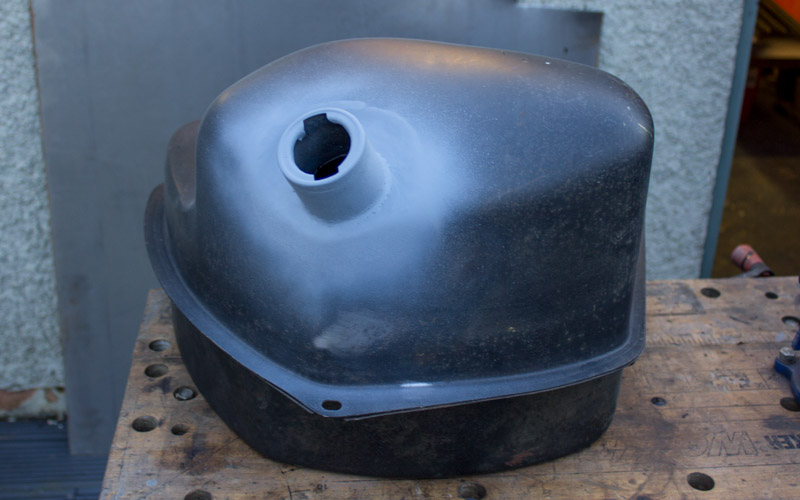
Then welded my little creation back onto the fuel tank. Now I can rub the rest of the tank down and paint it. Hopefully thats a few quid saved.
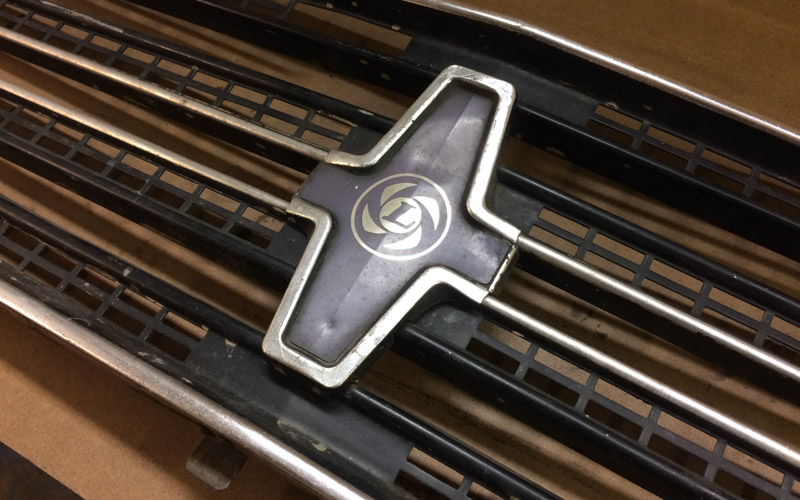
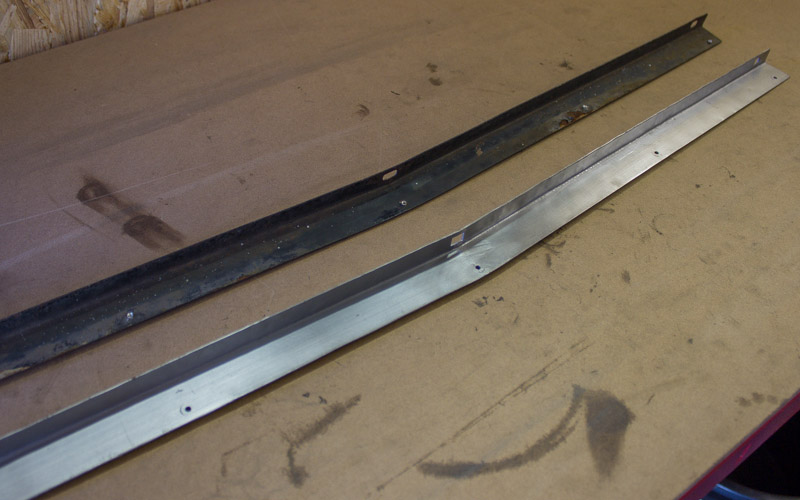
Meanwhile, I have had this clubman grille knocking around the garage since the very beginning of the project. Picked it up from an autojumble, and it was a bit tatty to say the least.
The top rail was well crusty, so I made up a new one.
And then after much sanding, polishing, masking and painting, I ended up with a slightly more presentable grille.
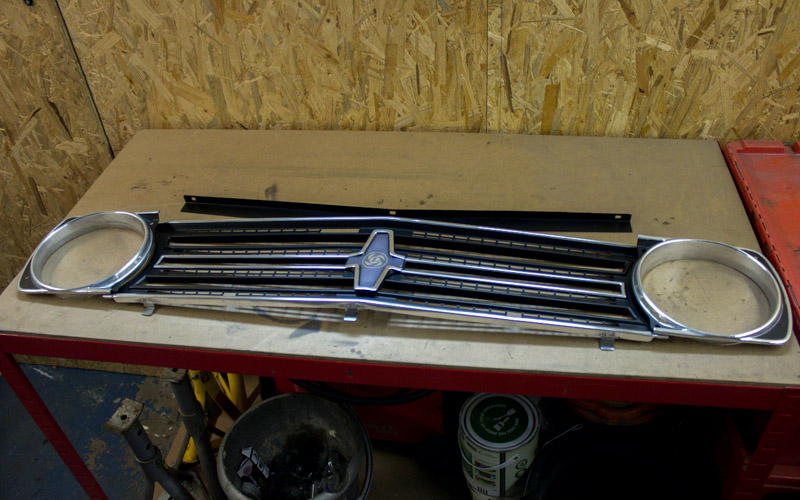
It would definitely have been much easier to just spray the whole thing black as I have seen a few people do, but I really wanted to keep the original look, so I think the extra effort was worth it. The black on the central leyland badge is quite faded and can't very easily be painted, so I've left that alone, but hey - patina!
So this is where I am now. Hi-Los are on, and the back is much lower. The front is turned right down, but still quite high - almost like it needs and engine to weigh it down a bit :)
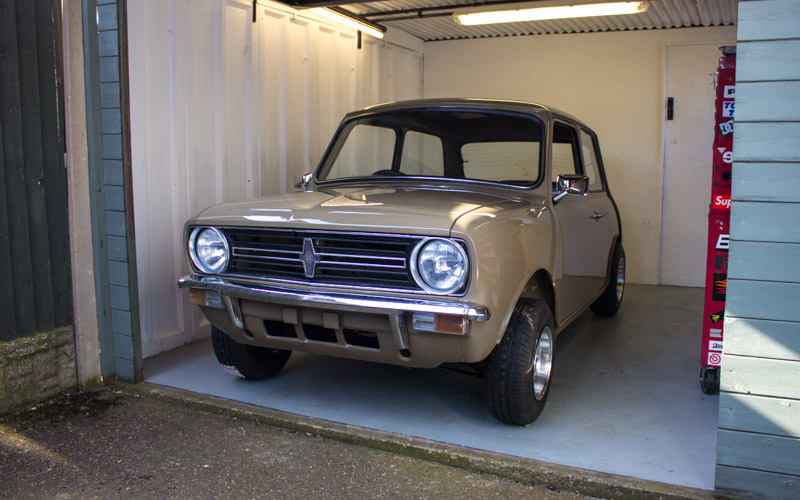
Bumpers and lights are also on now, but everything needs tweaking a bit to get the correct alignment and close up some gaps. Quite happy with the progress on the front end though!

No comments:
Post a Comment